Our Process
Stained glass is a physical, hands on process. From beginning to end, your piece is shaped by human hands and minds.
Working with the client at every step of the process, we start our custom stained glass by creating thumbnail sketches combining our collective ideas and inspirations.
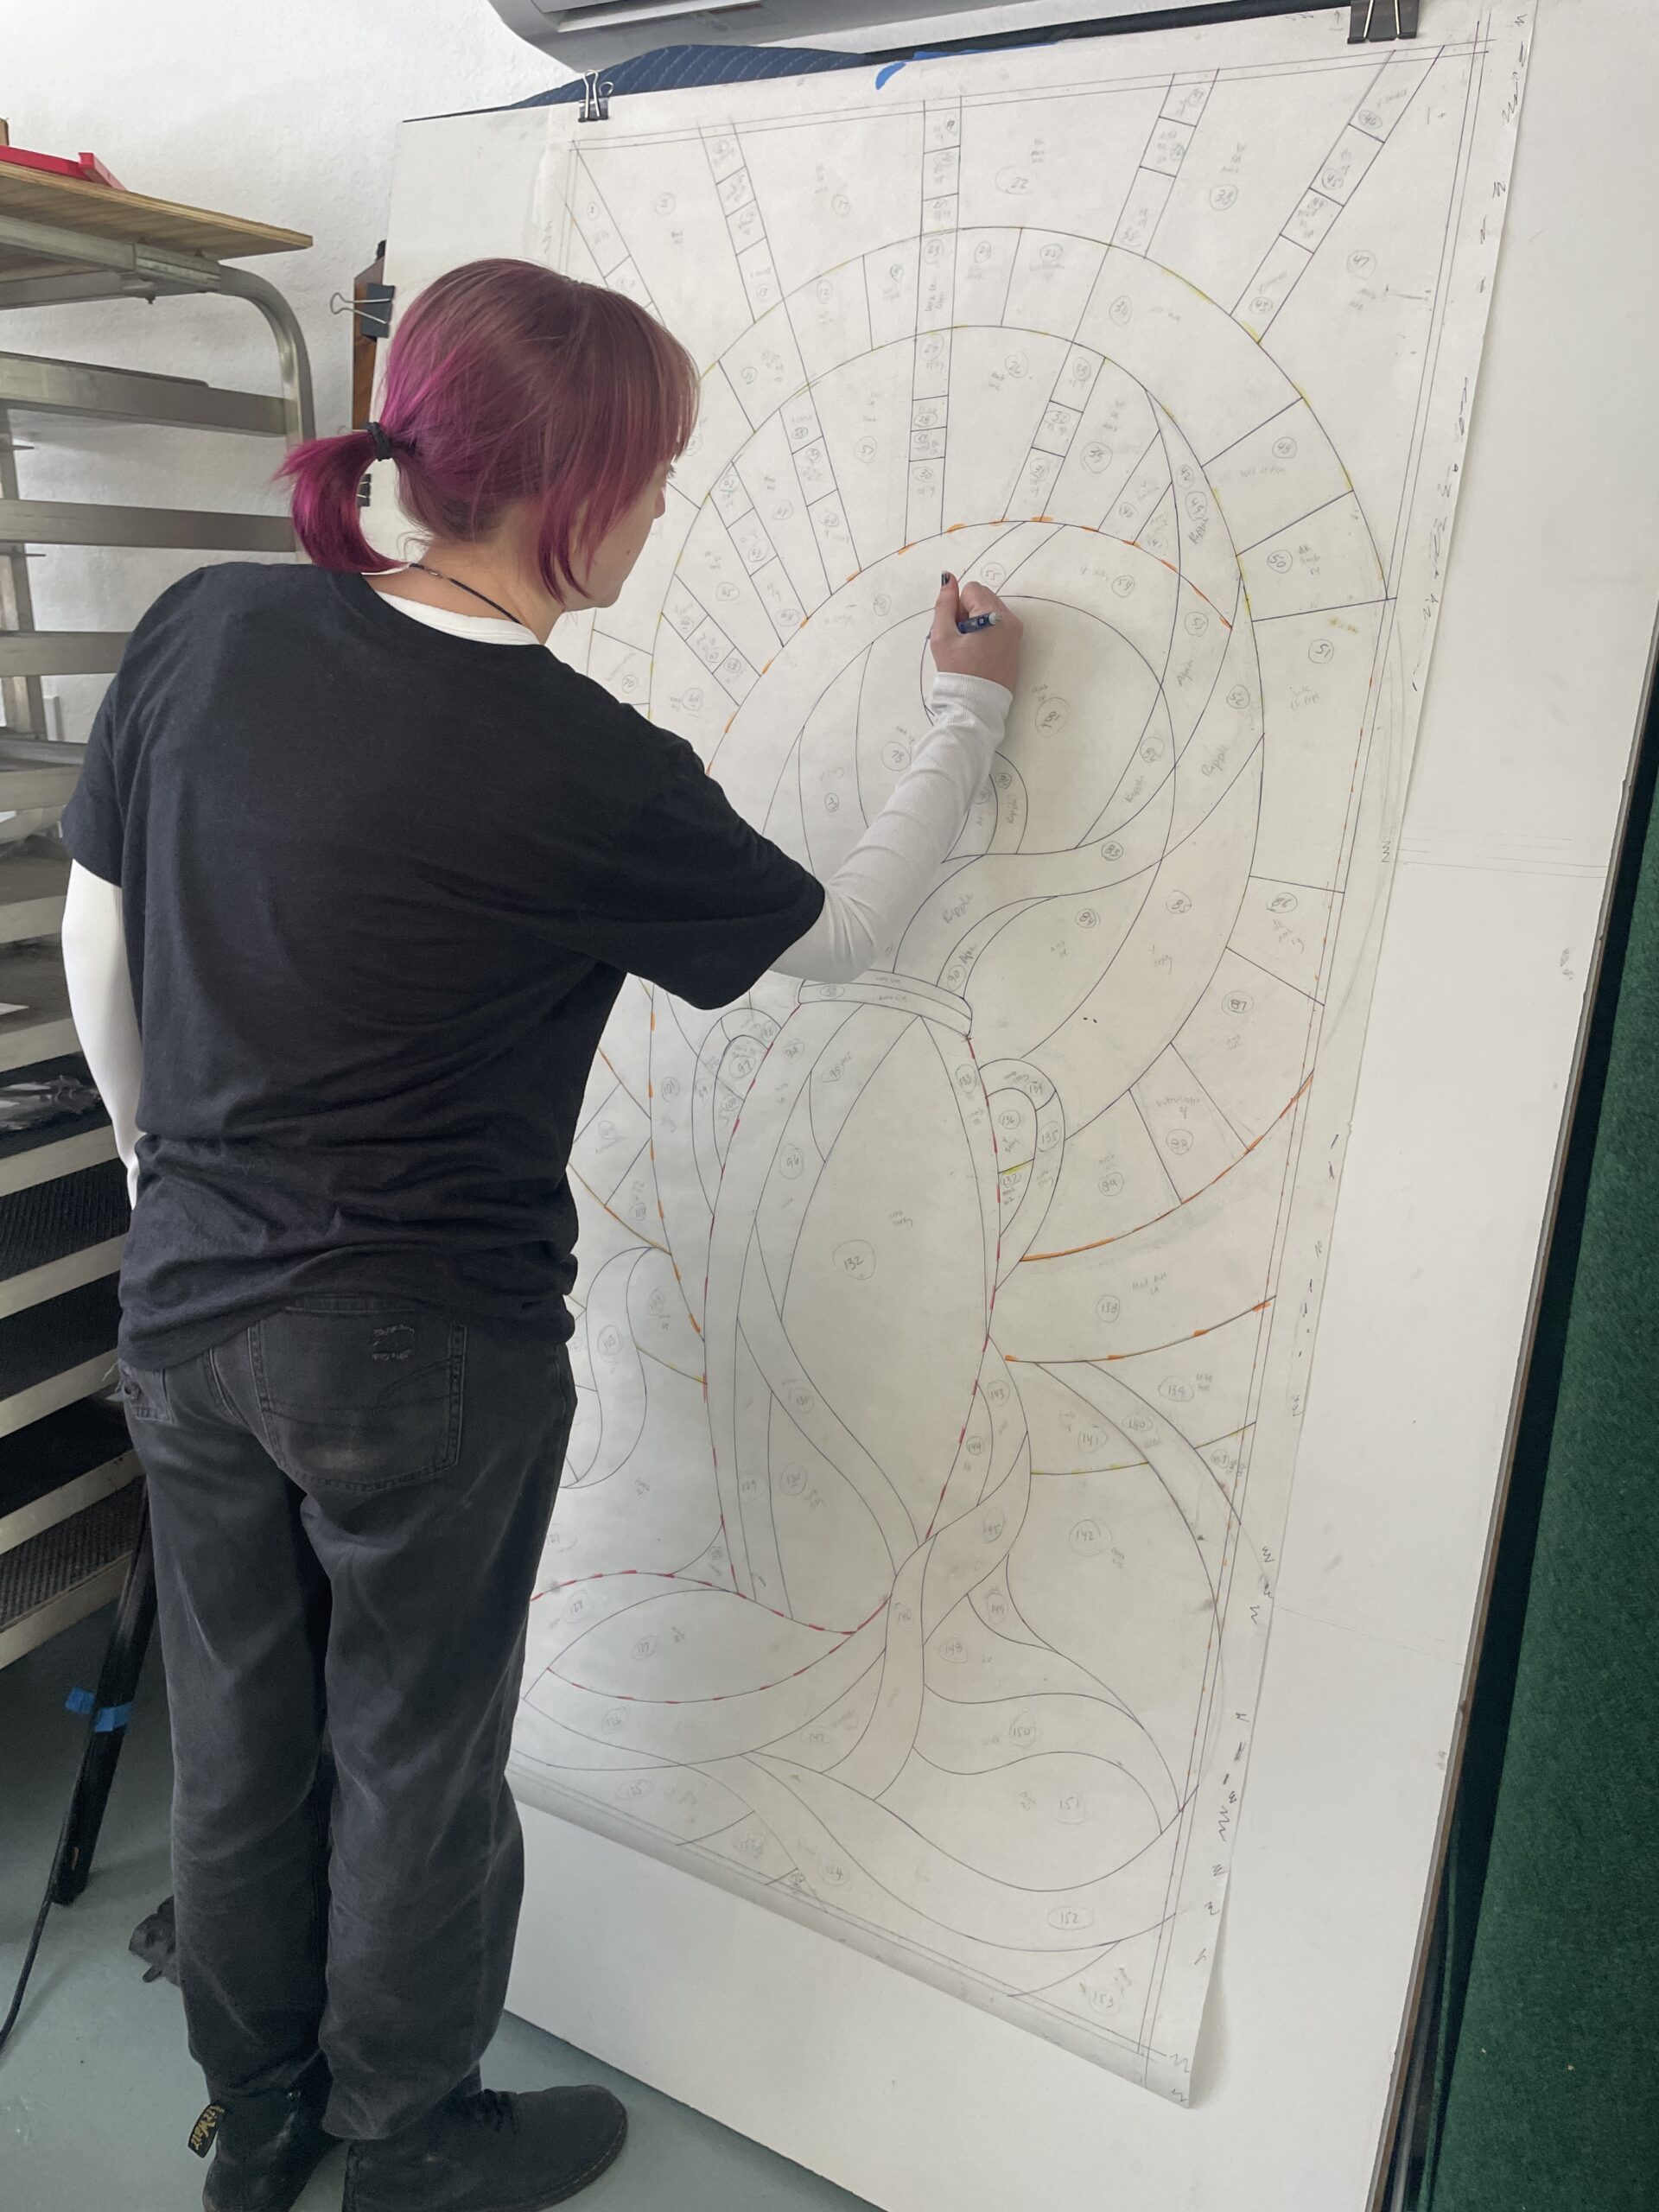
Once the design is approved, we render a full size drawing.
Here you can see Abby working on the full size sketch for “The Wedding at Cana” window for Our Lady of Grace Church.
After the sketch is finalized, we ink the lines, number the pieces, and decide the lead thickness, indicated by different colored highlighters. This window had 156 pieces in it!


Choosing colors and glass is one of the most important parts of the process. There are several factors that come into play here as we think about not just color, but also saturation, opacity, and texture of the glass. We also consider the location and function of the window, considering things like the direction its facing, the room it will be in, and level of privacy. Here you can see some glass we chose for this entryway panel, and the finished piece beside it using the same colors.
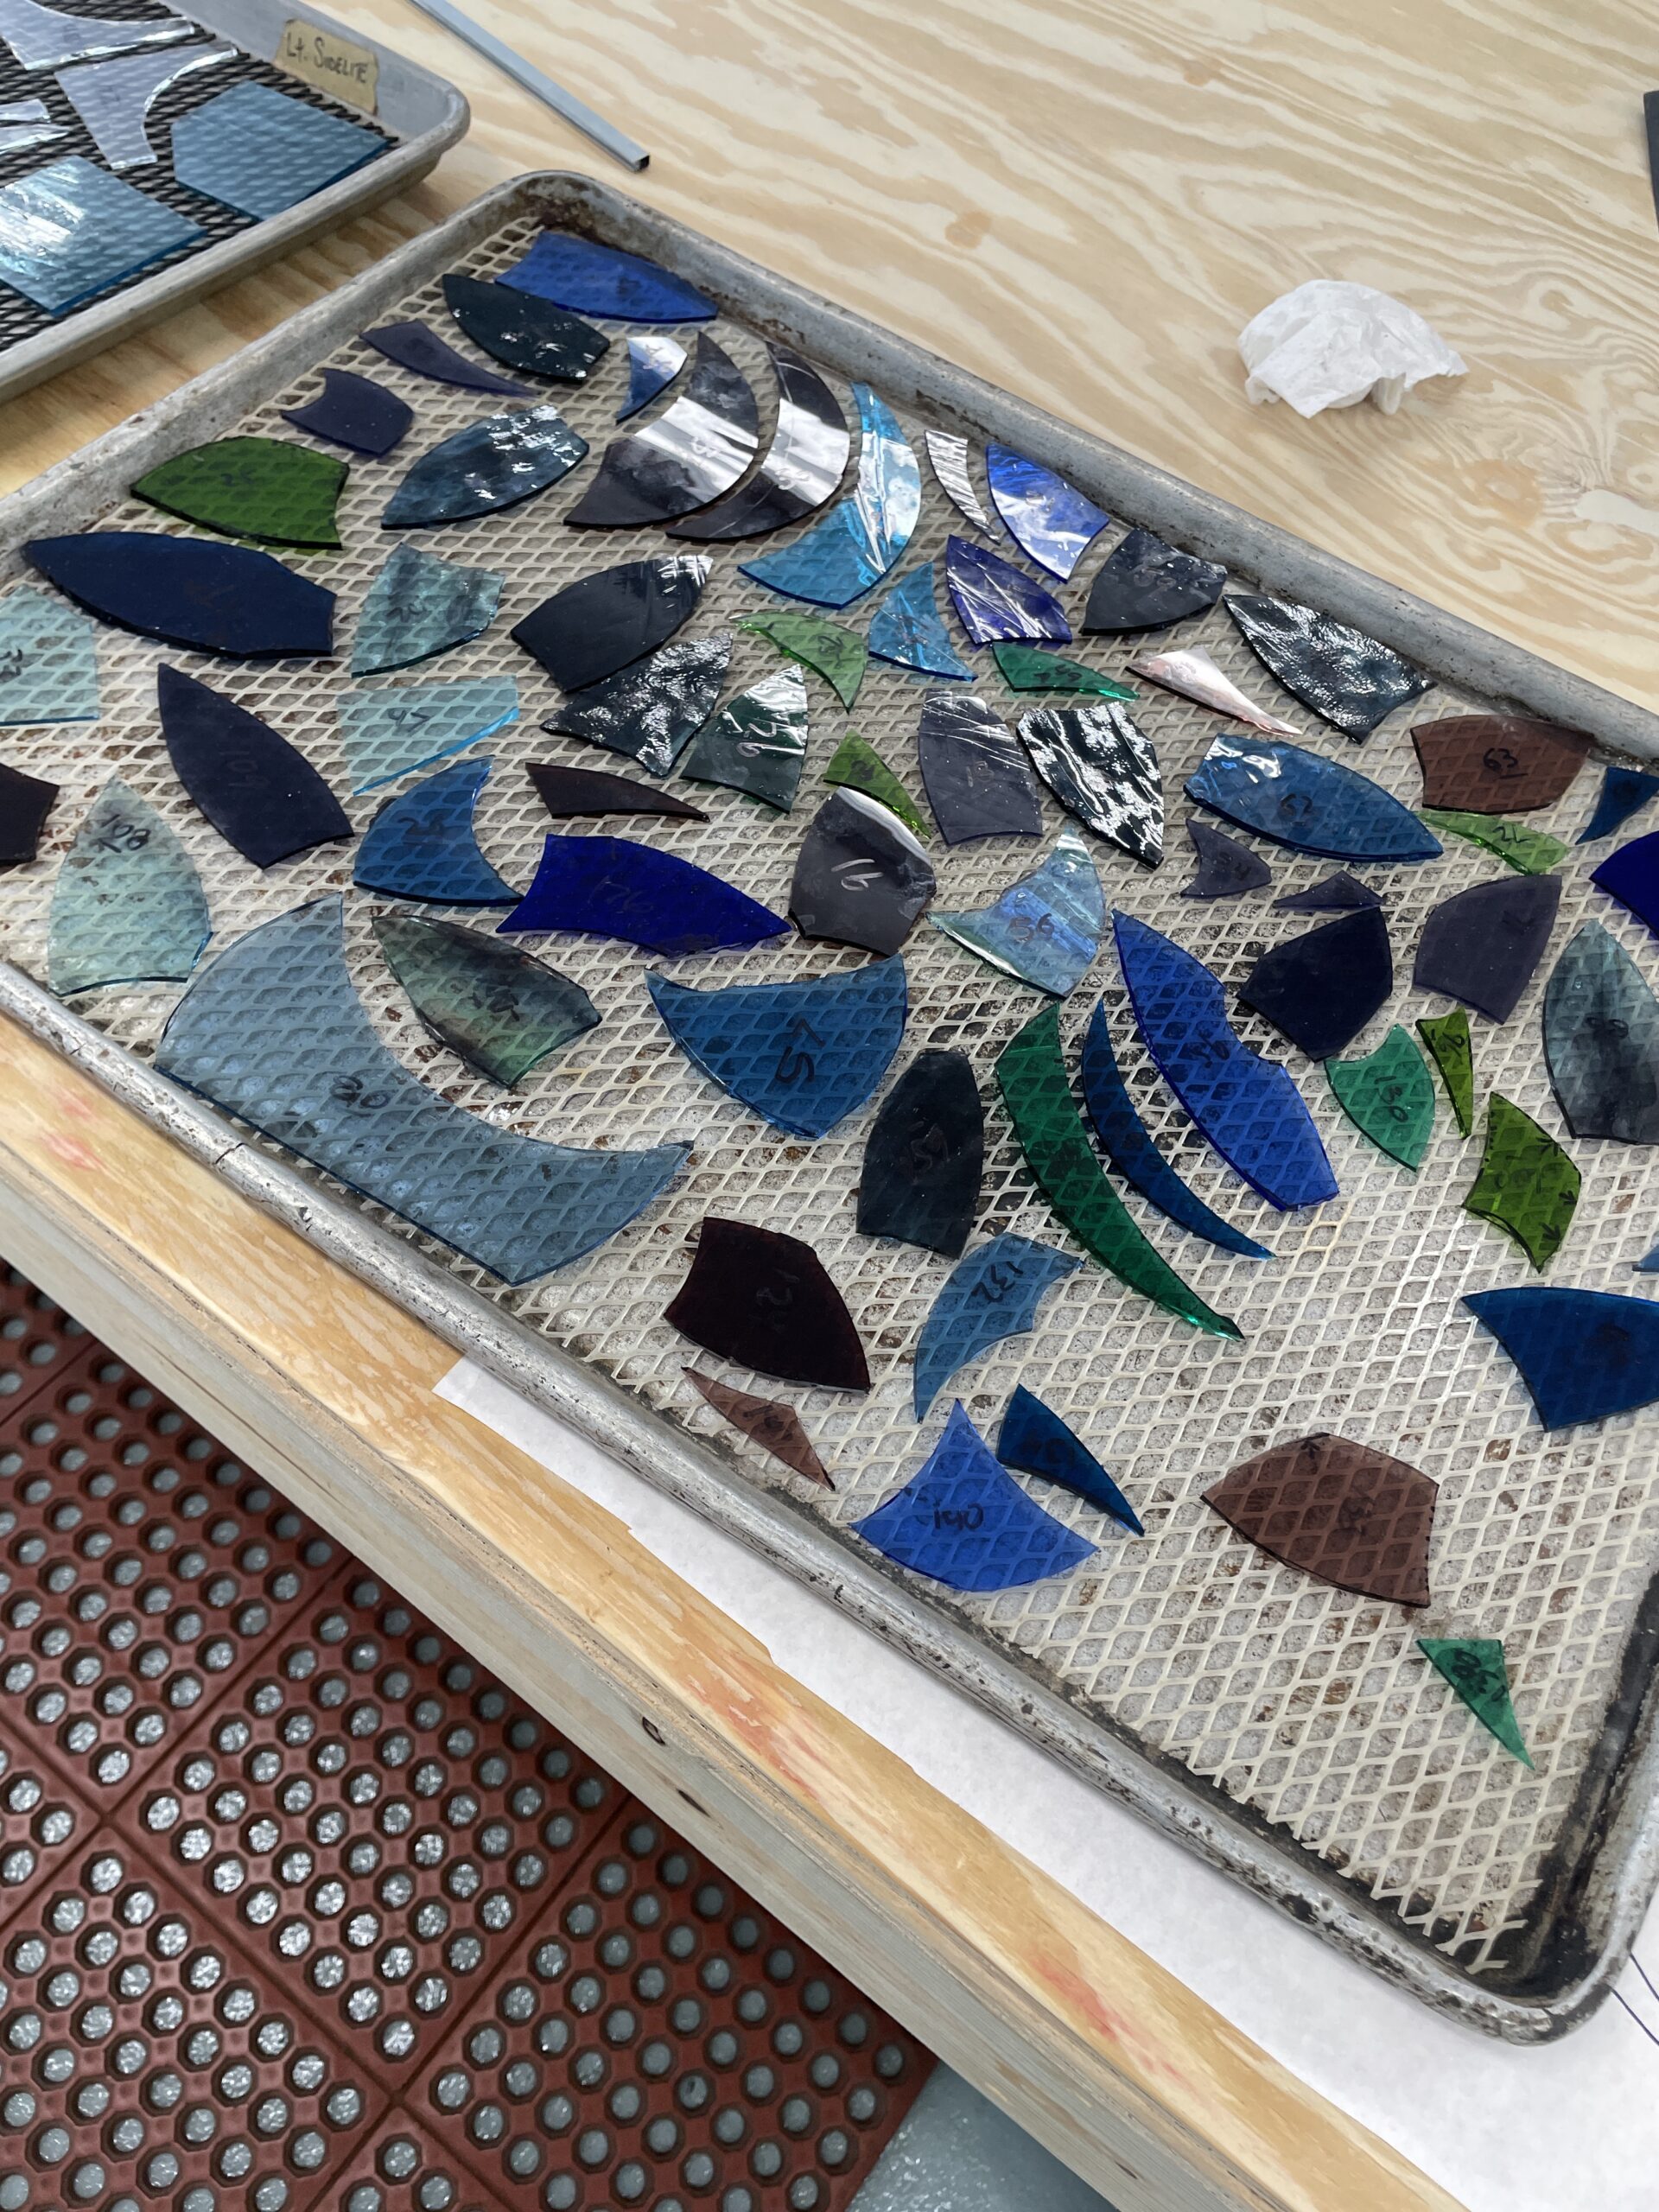
After finalizing colors and glass types, we begin cutting. We use a glass cutter that has a tungsten carbine wheel that is used to score the glass. We then tap it to break it along the score line.
Deep inside curves and thin pieces are the trickiest pieces to cut and require great patience and skill.
As we cut the pieces we number them and put them on a tray like the picture to the right. These are the pieces for the “Three Little Birds” panel.
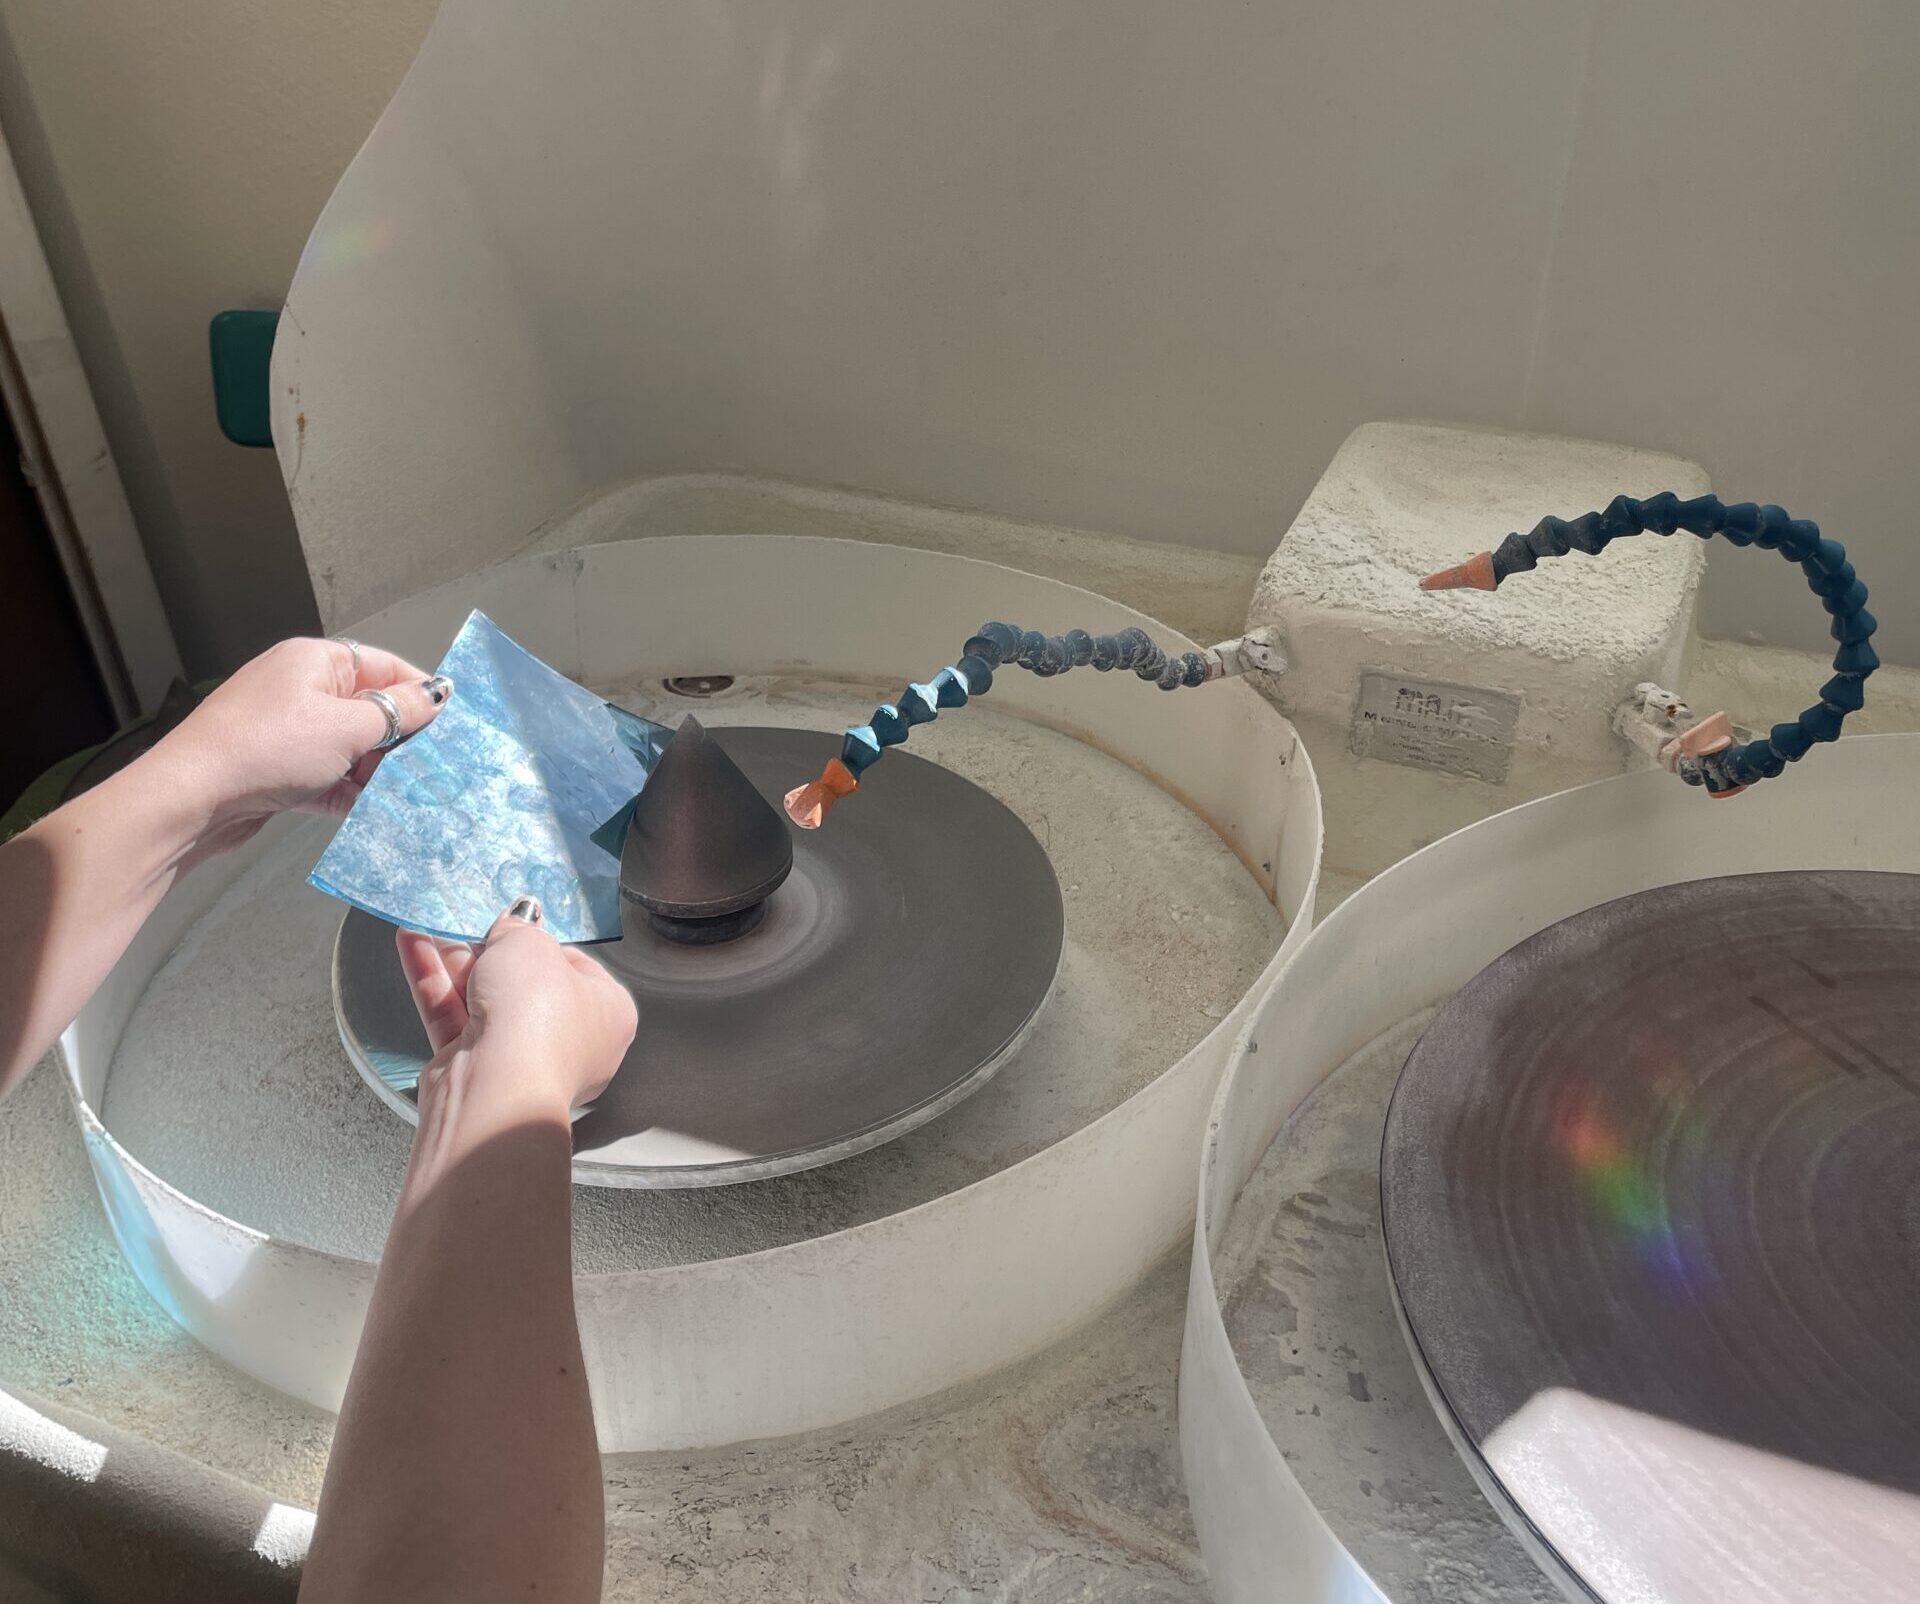
After cutting all the pieces, we begin grinding the glass. Since its impossible to perfectly cut glass, grinding helps make the glass fit exactly on our pattern.
This glass grinder uses a diamond wheel to shape the glass. The cone in the center is for grinding curves and the flat wheel is for straight lines.
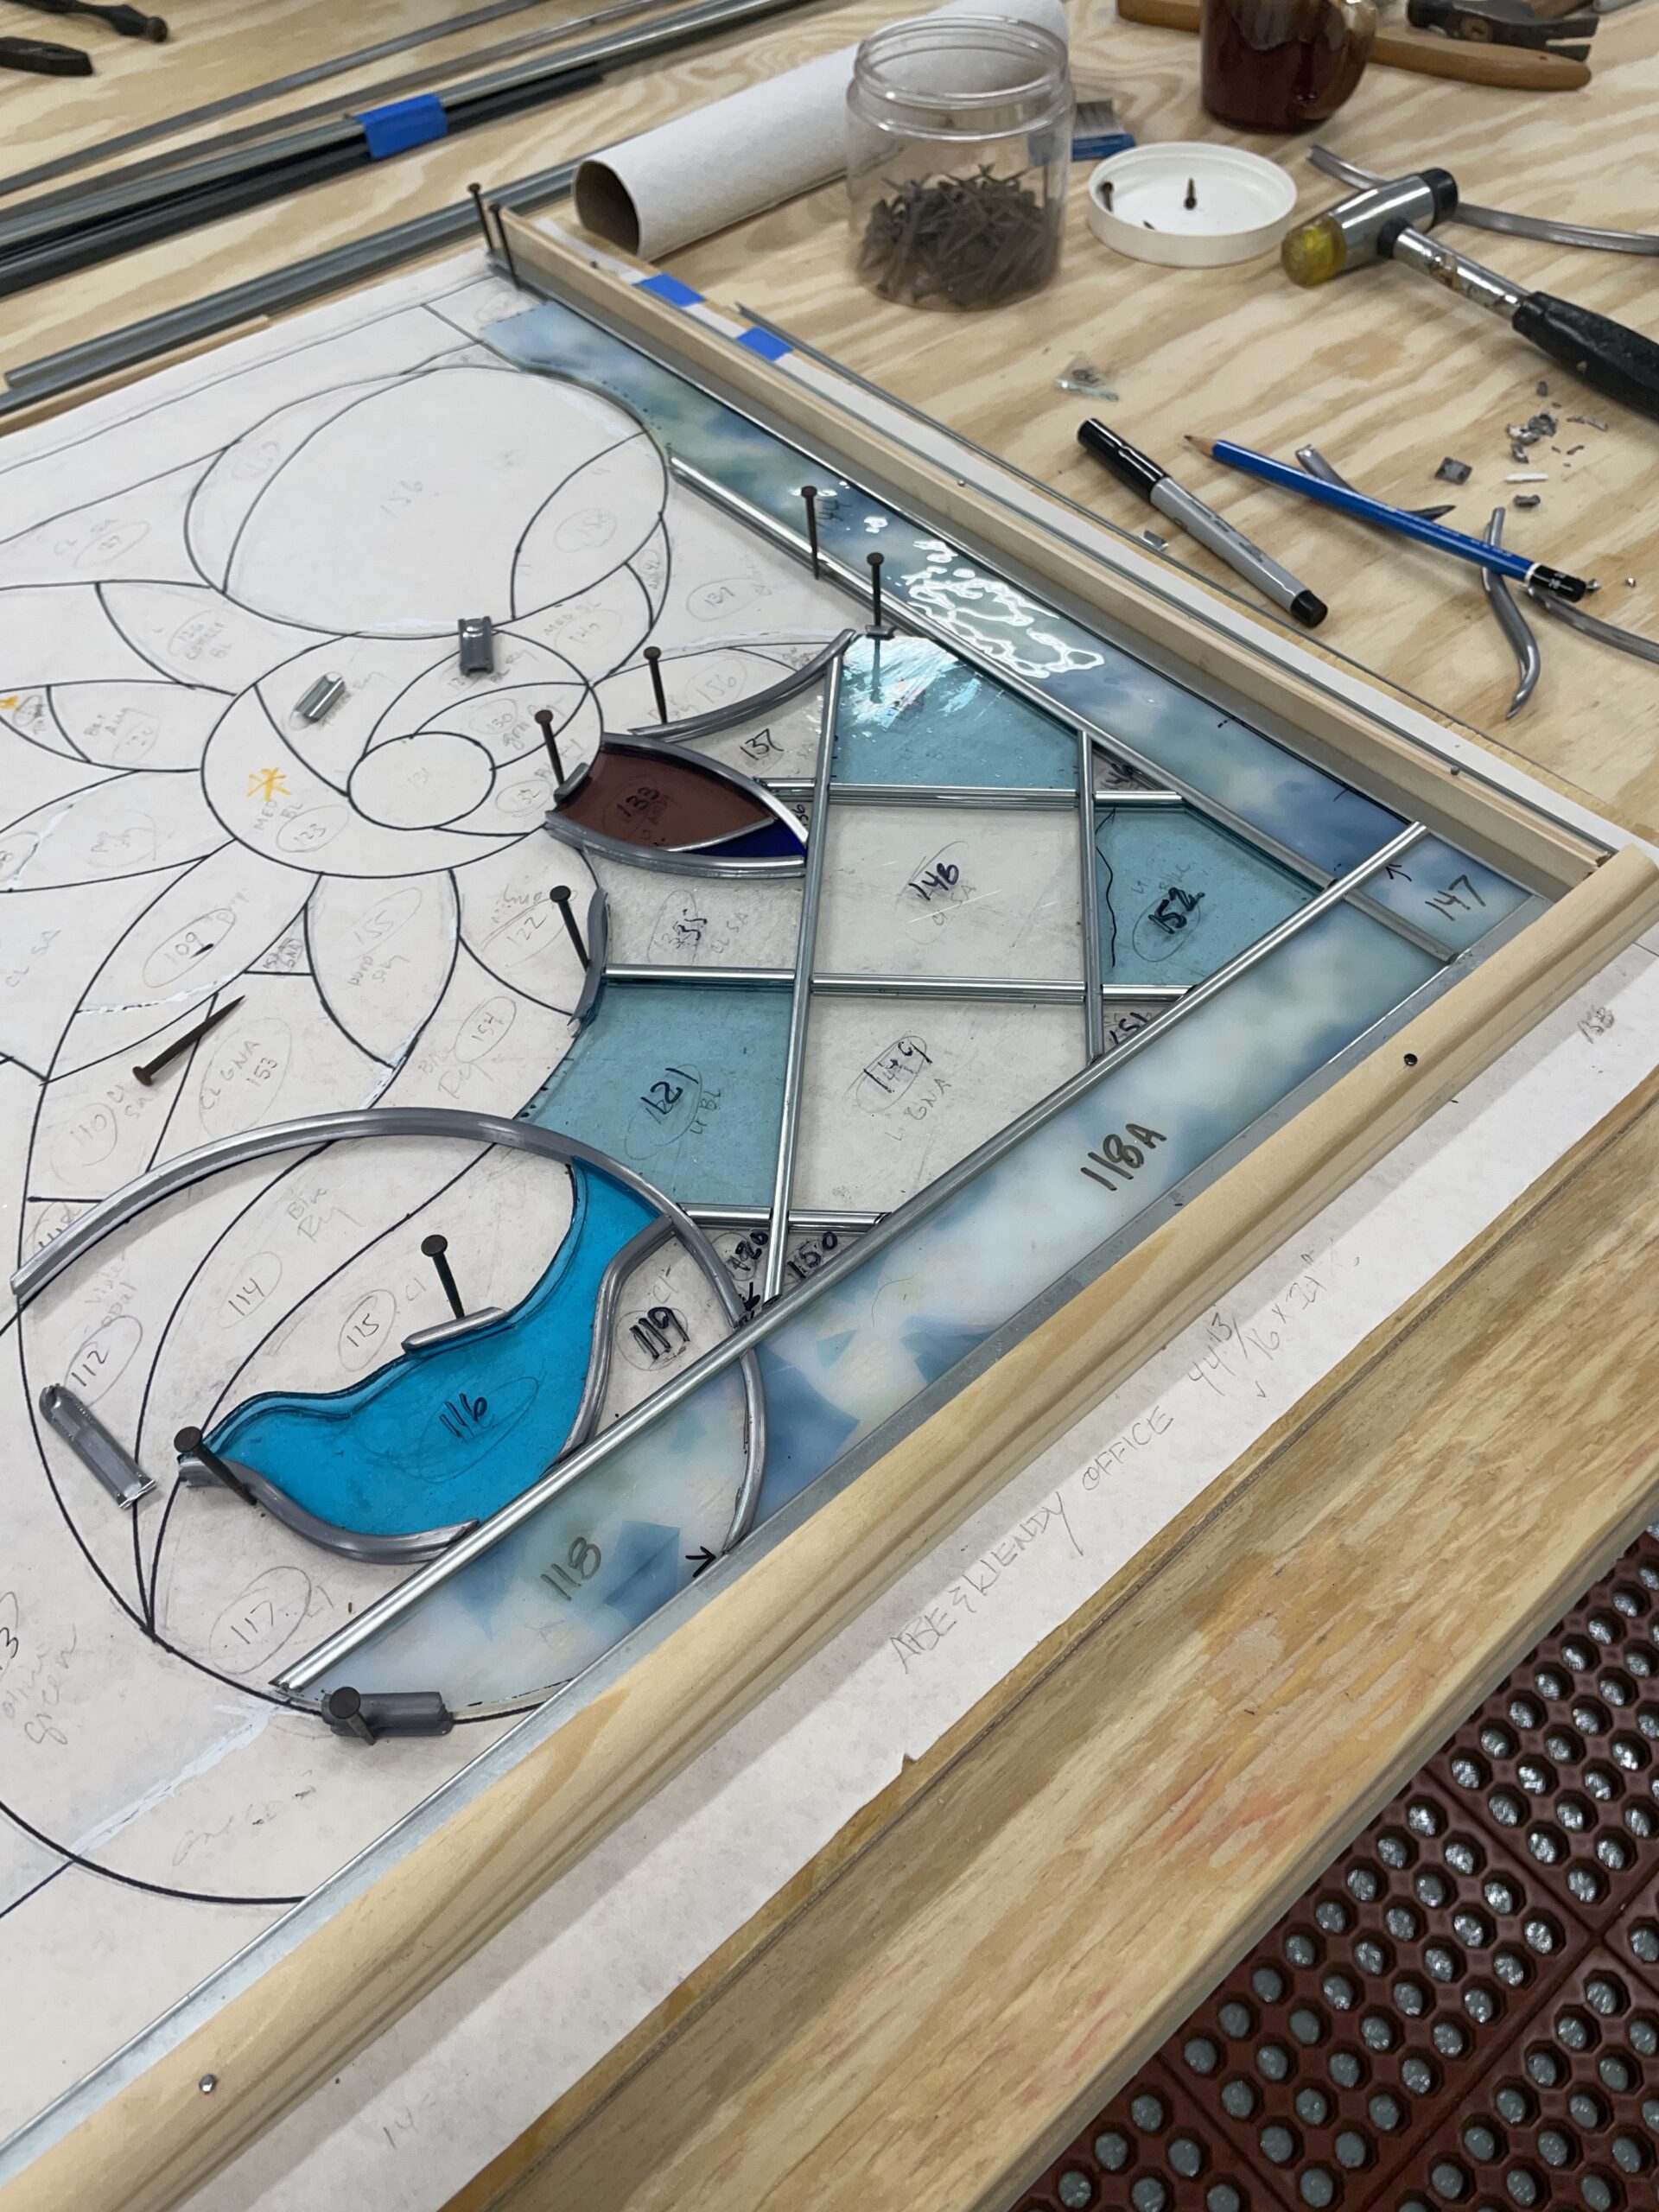
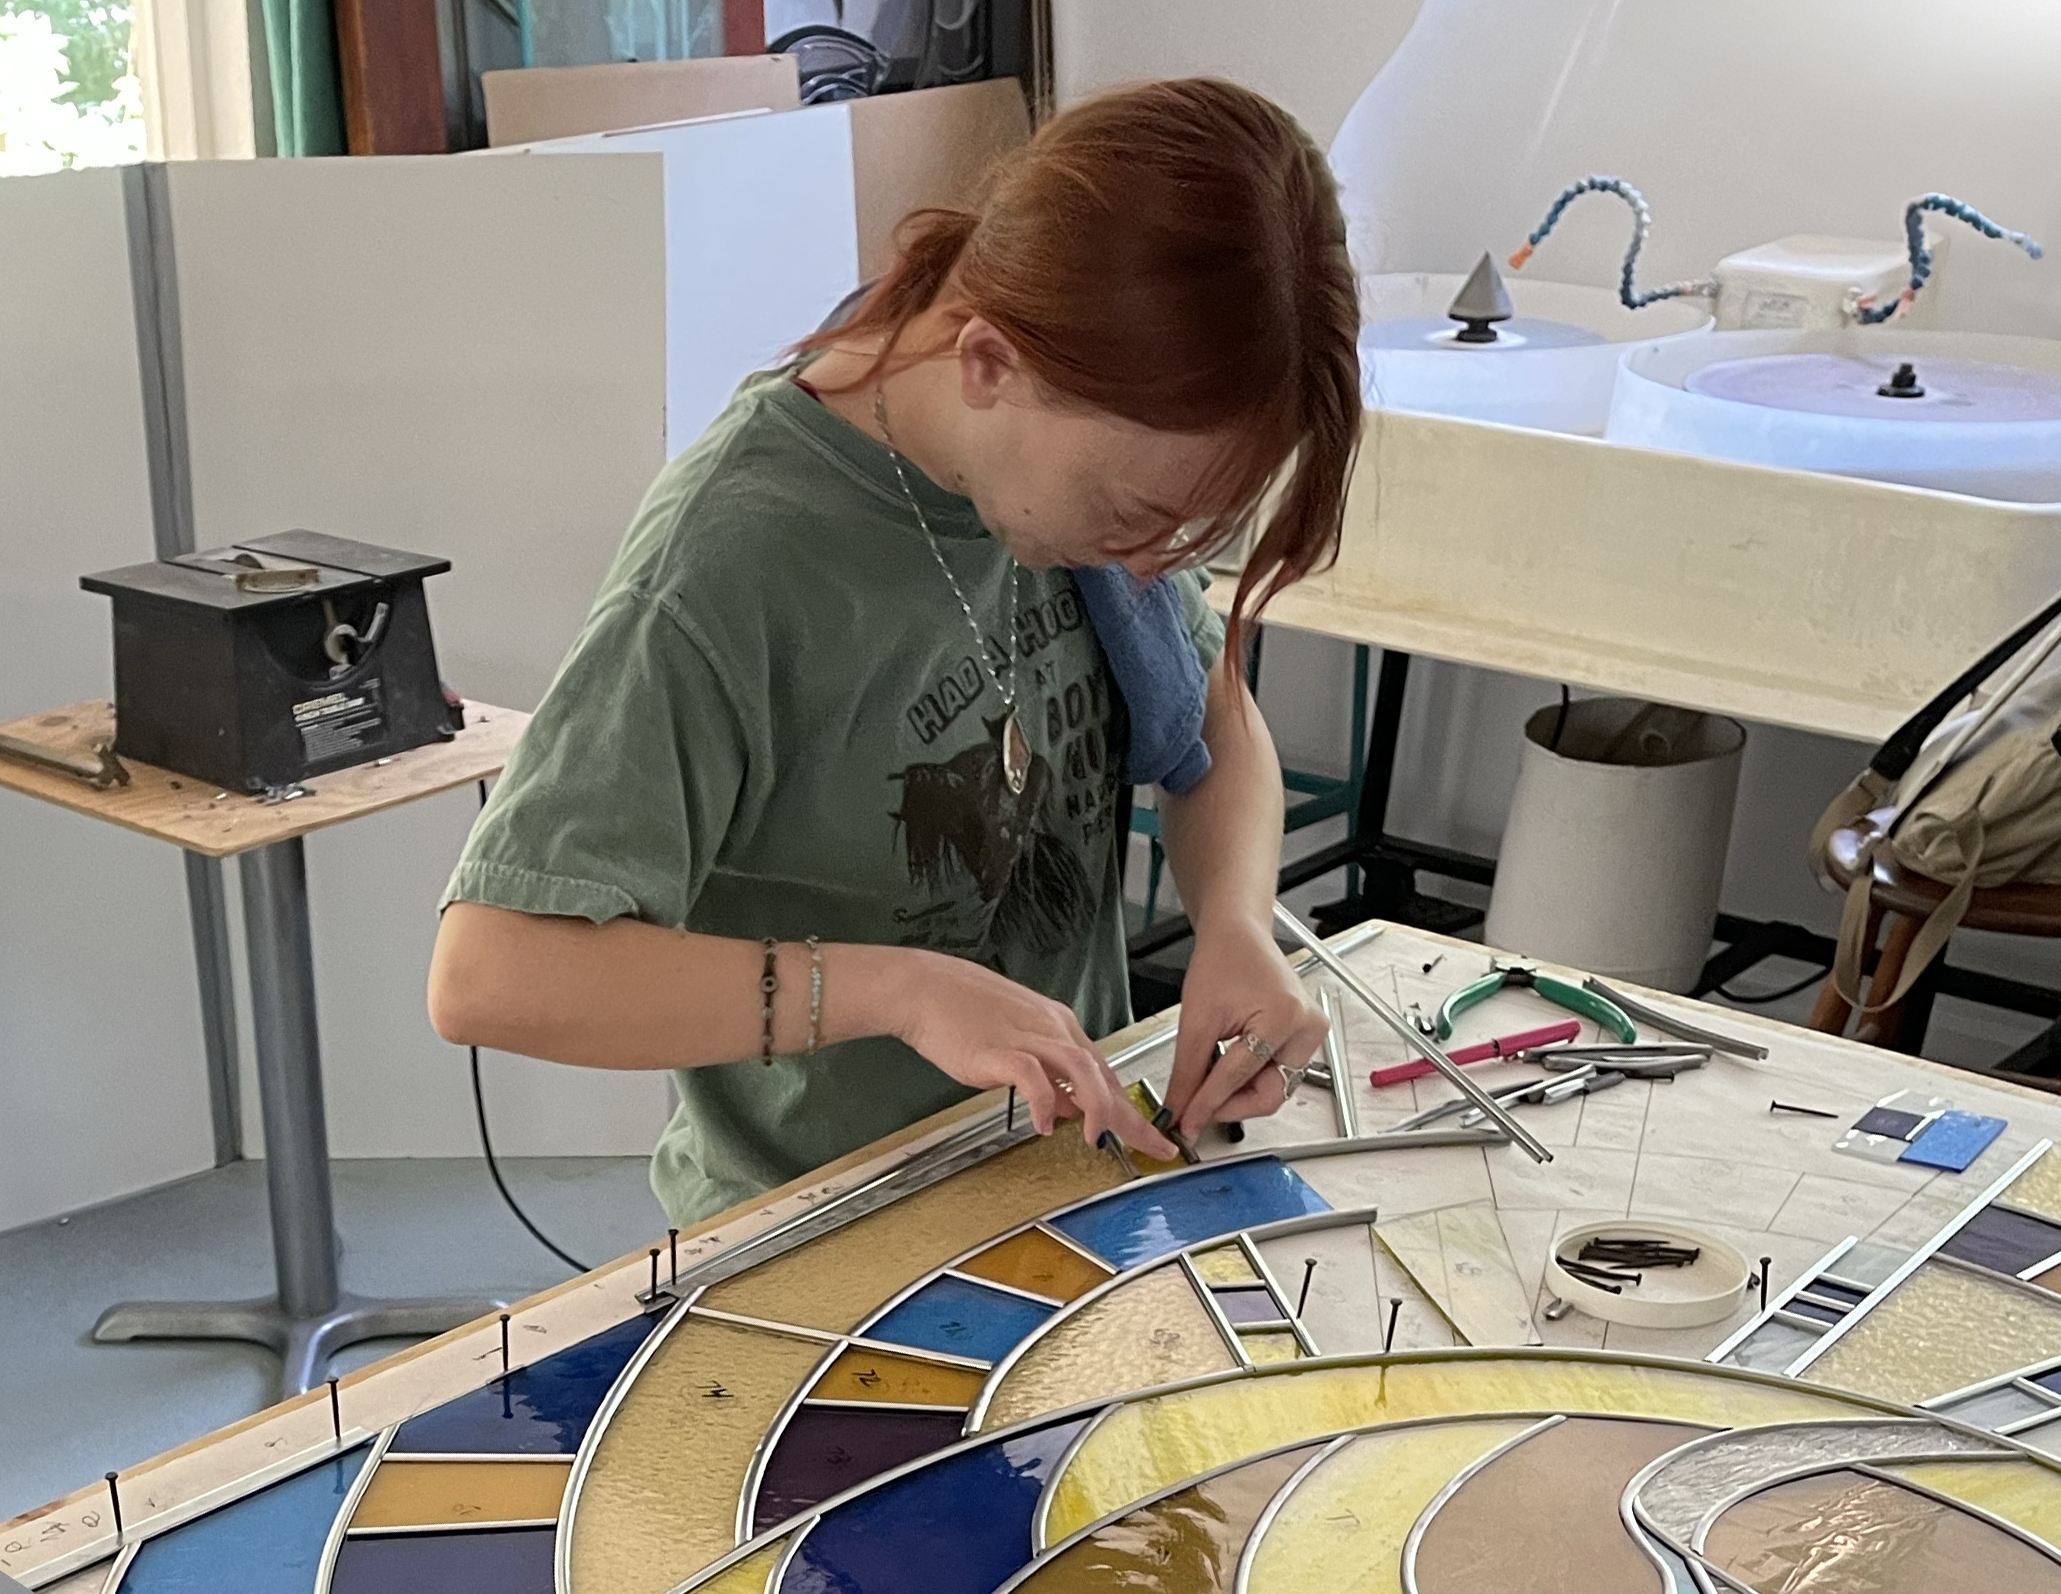
After grinding the glass, we begin assembling the panel. This part is called leading because we fit the glass inside lead channels. We also use zinc, which is stronger and lighter but harder to bend. We hold the glass in place while we work with special German nails. It is important to make sure the pieces stay aligned and that nothing shifts while leading.
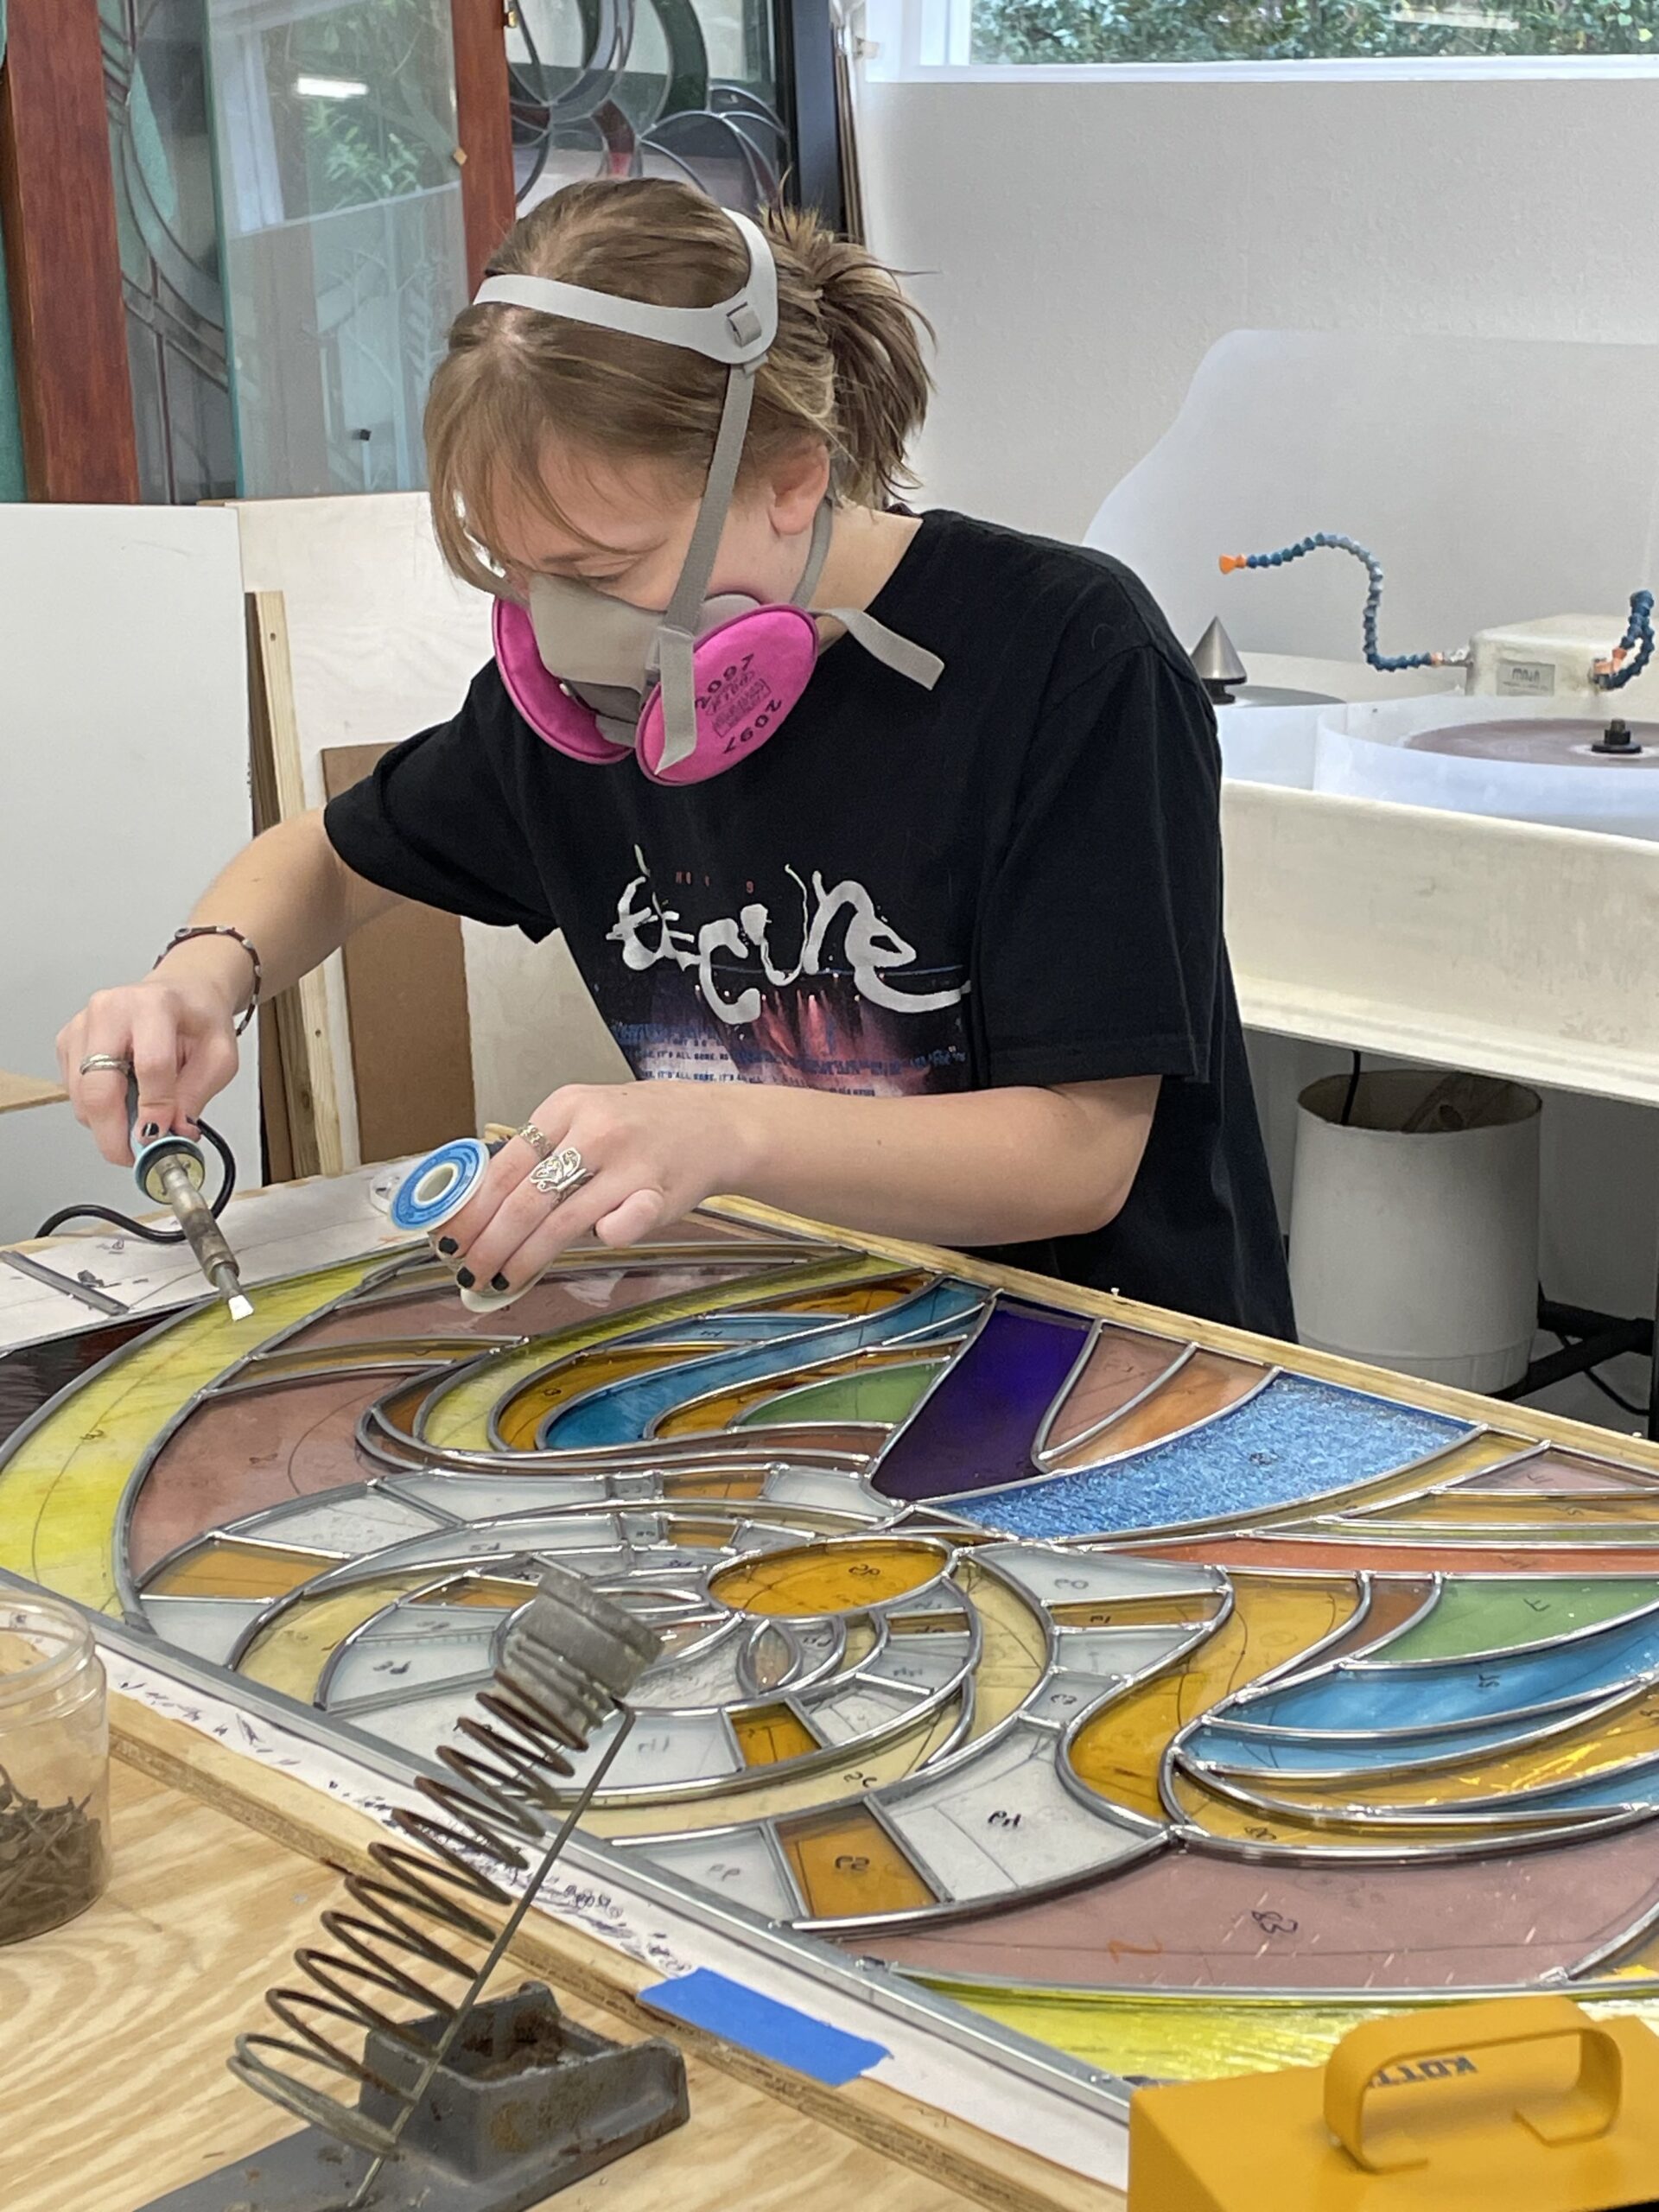
After the panel is leaded we solder the joints together to ensure it is structurally sound and stable. We melt the solder with a soldering iron to create a strong bond at each joint. This locks the lead “came” in place and keeps the panel from shifting or sagging.
Here you can see Abby soldering the top panel of “Joseph visited by Angel Gabriel in a dream”
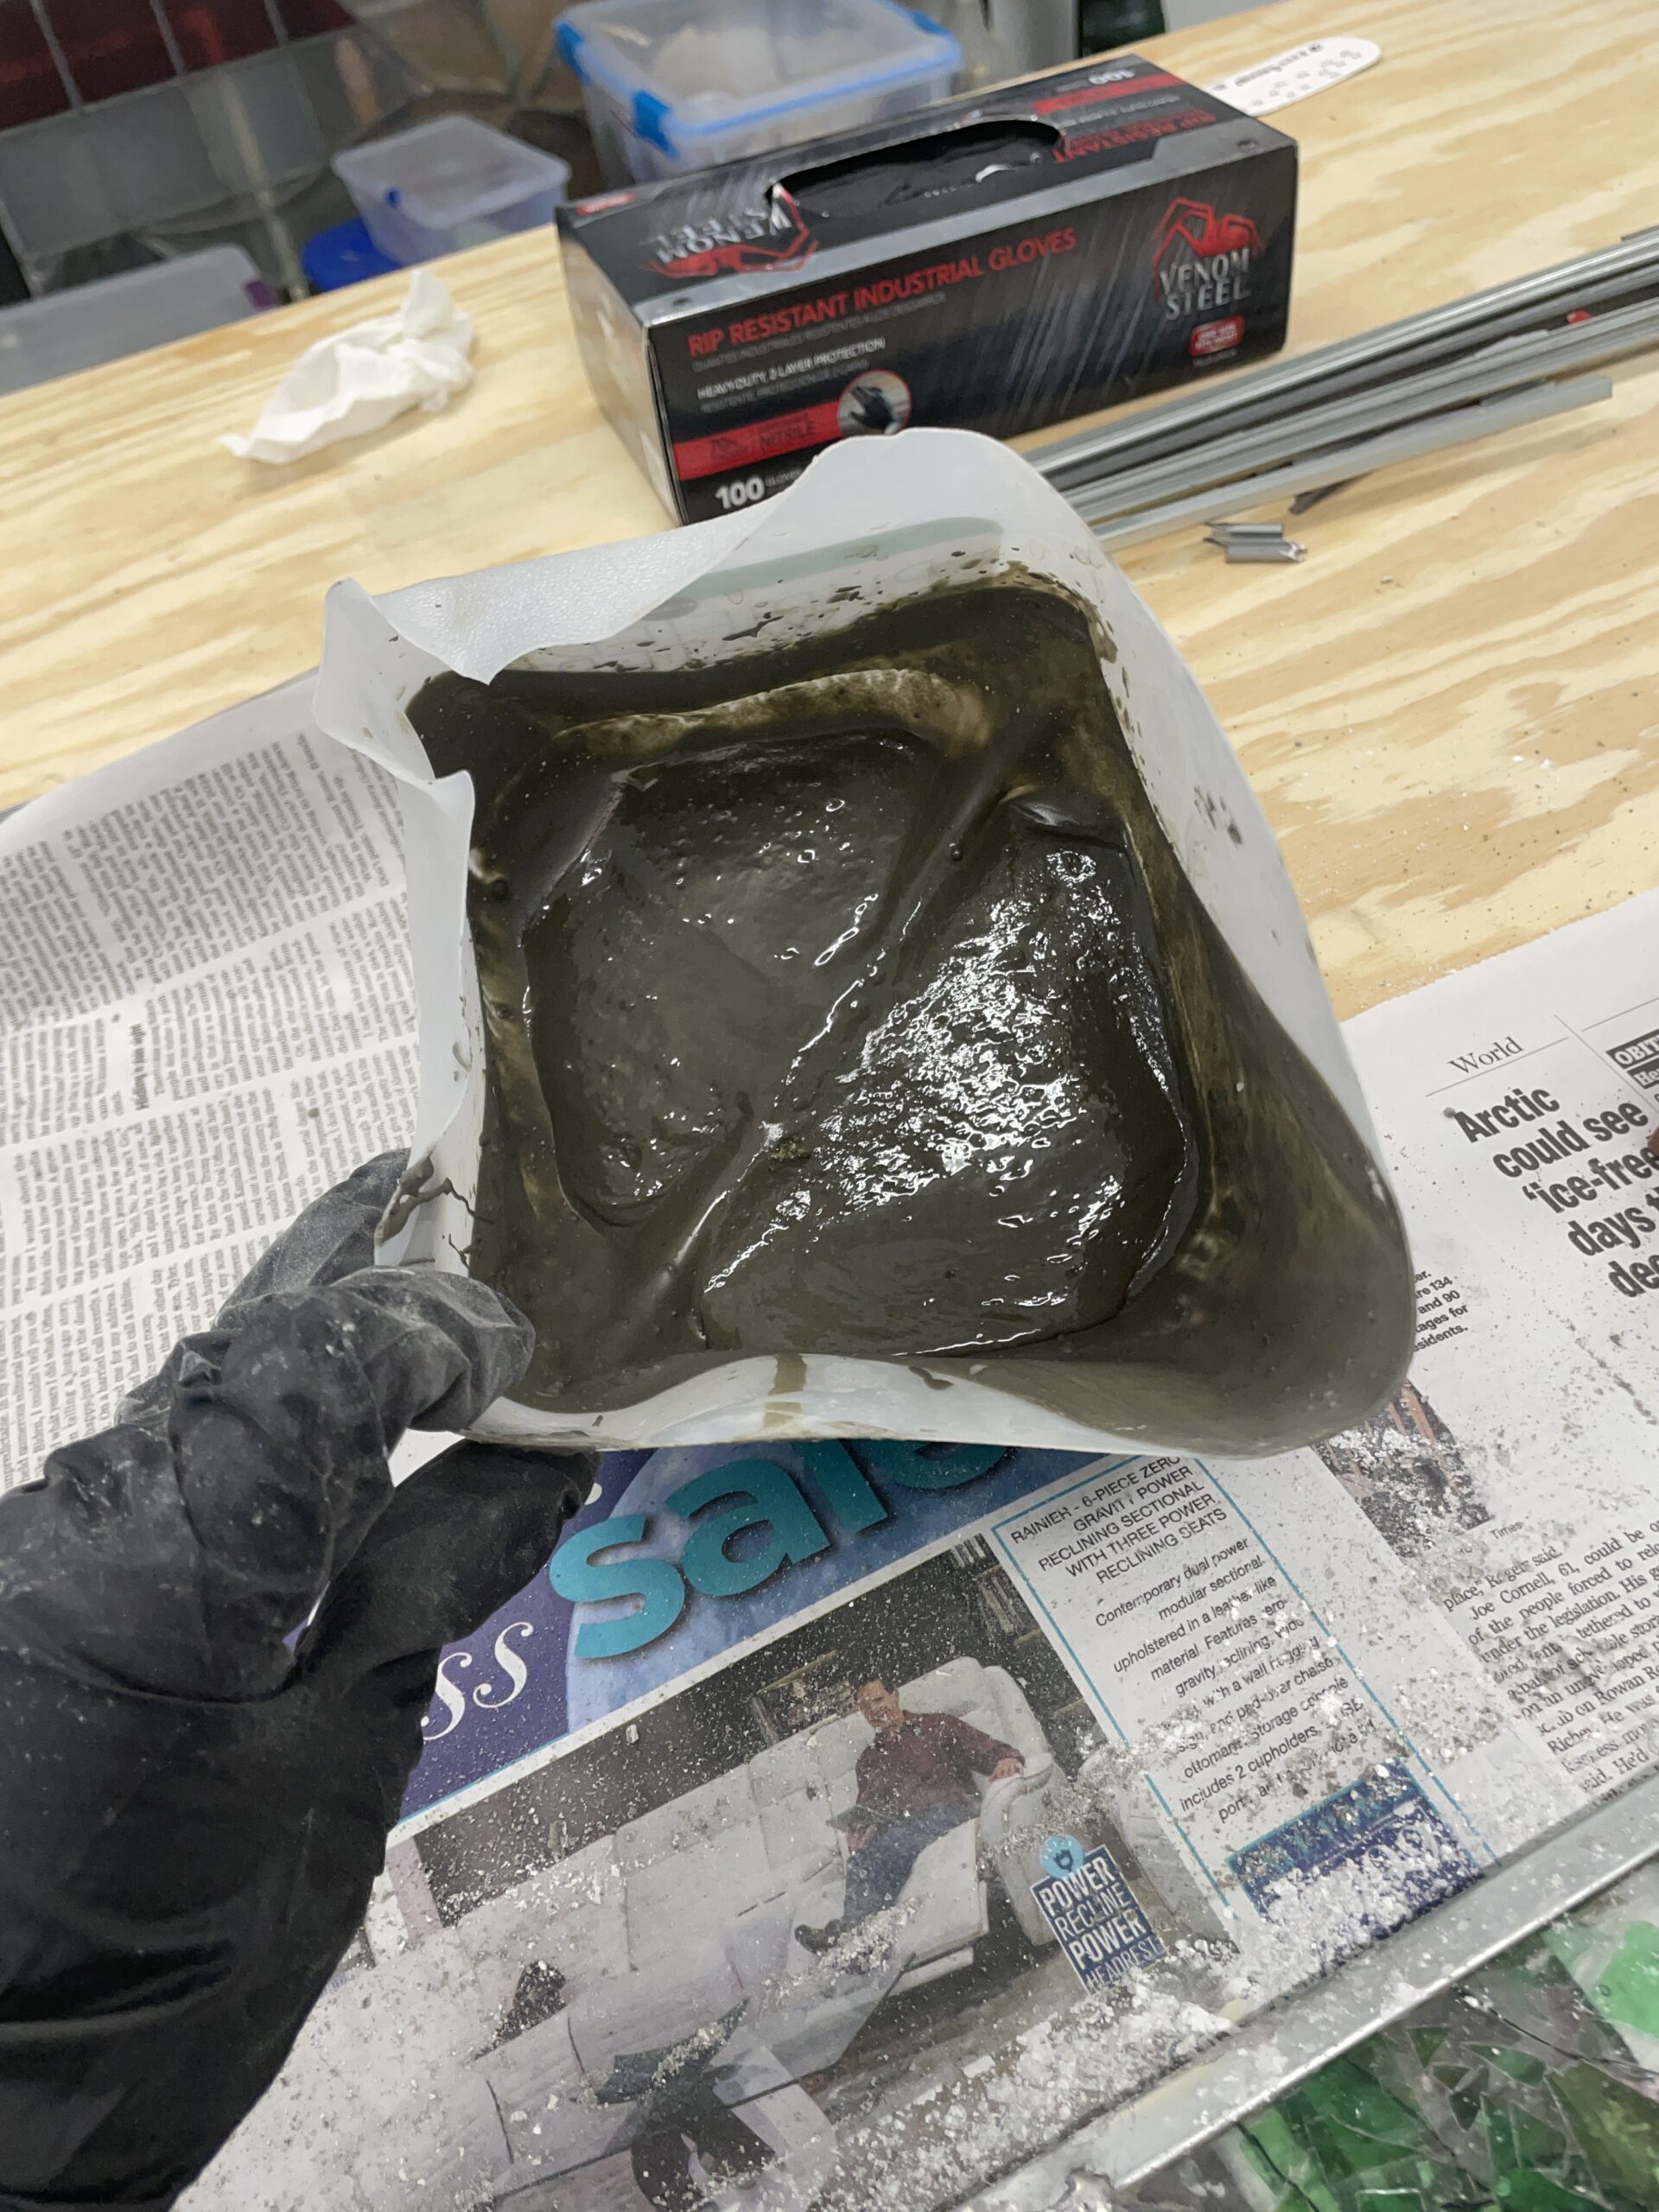
After soldering we putty the panel to ensure it is rigid, durable, and waterproof. The putty fills the gaps between the lead channels and the glass to strengthen the overall structure. Below you can see the putty mixture and the panel in process of being puttied. We brush the putty into the channels and begin the extensive process of cleaning and polishing the glass.